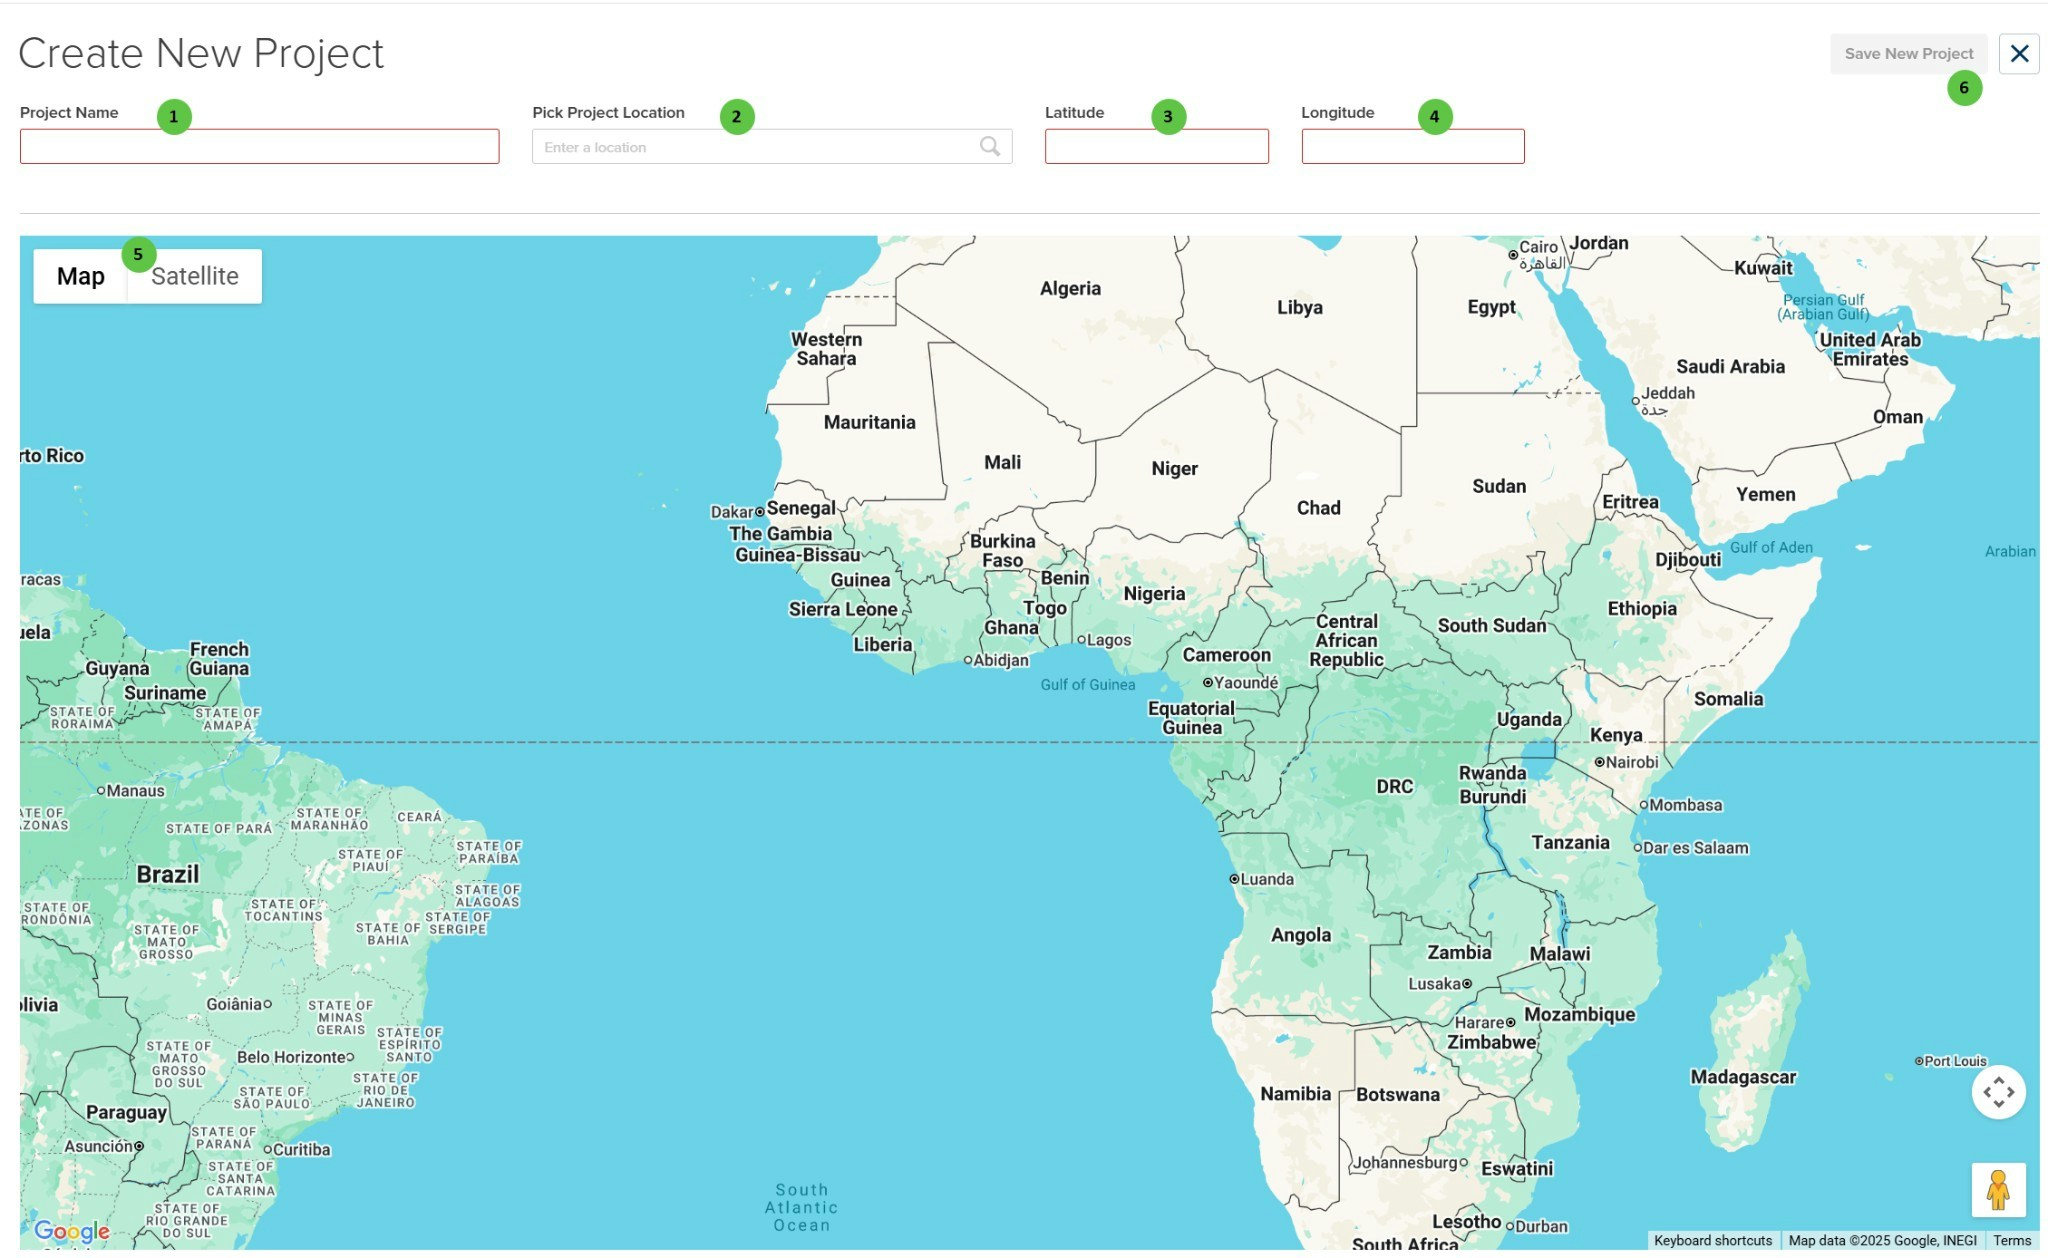
| **1** |
**Project Name** |
Text Field |
— |
Enter a descriptive name for the project. This name will be used to identify the project throughout PlantPredict. |
— |
| **2** |
**Pick Project Location** |
Search Field |
— |
Search for a location by entering a city, address, or landmark. The search uses Google Maps to find and geocode the location, automatically populating the Latitude and Longitude fields. |
— |
| **3** |
**Latitude** |
Text Field |
degrees |
The latitude coordinate of the project location. Positive values indicate North, negative values indicate South. Can be entered manually or populated via location search or map click. |
— |
| **4** |
**Longitude** |
Text Field |
degrees |
The longitude coordinate of the project location. Positive values indicate East, negative values indicate West. Can be entered manually or populated via location search or map click. |
— |
| **5** |
**Map / Satellite** |
Toggle |
— |
Switch between Map view (street/terrain) and Satellite view (aerial imagery) for the interactive map. |
— |
| **6** |
**Save New Project** |
Button |
— |
Saves the project with the specified name and location. The project will be created and you will be redirected to the project dashboard. |
[Predictions Library](/user-guide/ui/predictions) |
 ## Overview
The Create New Project page is organized into two main areas:
1. **Project Header** — Enter the project name and specify the geographic location using either a location search or direct latitude/longitude coordinates.
2. **Interactive Map** — Visual map interface for selecting or verifying the project location. Supports both Map and Satellite views.
***
## User Inputs
## Overview
The Create New Project page is organized into two main areas:
1. **Project Header** — Enter the project name and specify the geographic location using either a location search or direct latitude/longitude coordinates.
2. **Interactive Map** — Visual map interface for selecting or verifying the project location. Supports both Map and Satellite views.
***
## User Inputs